You want to learn how to stream on Twitch. Here is the reality: your first broadcast is not a performance, it is a systems test.
This guide covers exactly how to start streaming on Twitch from a PC, console, or phone in 2026. Many older setup tutorials fail beginners immediately because Twitch officially discontinued its native Twitch Studio software on May 30, 2024. The goal is to get you to live fast before frustration sets in. Let's build your zero-dollar setup.
How do I start streaming on Twitch step by step?
To stream on Twitch, create a free Twitch account and set up two-factor authentication (2FA). Next, download free broadcasting software like OBS Studio. Connect your Twitch account to OBS, run the Auto-Configuration Wizard to optimize your settings, add your game and microphone sources, and click "Start Streaming."
What You Need to Start
Start with the gear you already own. Upgrade only after your first few broadcasts reveal what actually needs improving.
Do not fall into the trap of buying expensive equipment before you go live. The zero-dollar starting path prevents wasted money.
The $0 setup that works
Use the PC, console, or phone sitting on your desk. Plug in your current gaming headset for microphone audio, download free software, and connect your account. This is the default recommendation.
The minimum hardware that matters
Your device must handle gaming and encoding video simultaneously. You need a stable upload connection. Most importantly, you need a microphone that makes your voice understandable. Clean audio beats fancy video every time.
Upgrade ladder by problem, not hype
Buy a dedicated USB microphone first if your voice sounds muffled. Add a cheap ring light before upgrading your webcam. Buy a capture card only when your specific device path (like a Nintendo Switch) requires it. A second monitor helps you read chat, but propping your phone against a cup works perfectly for your first six months.
Best Beginner Software for Twitch Streaming
Start with OBS Studio unless you have a strict reason not to. Beginners need software stability and low computer overhead more than built-in alert widgets.
Choosing the right software determines how smoothly your games run while broadcasting. Let your hardware dictate this choice.
Important: Twitch Studio is discontinued: Twitch officially shut down Twitch Studio on May 30, 2024. Any tutorial telling you to download it is outdated. New creators must choose third-party tools.
OBS Studio: OBS Studio is the default choice. It uses minimal system resources, offers full control, and is free forever. Its modern Auto-Configuration Wizard handles the heavy lifting, making manual setup mostly obsolete.
Streamlabs Desktop: Streamlabs Desktop prioritizes quick convenience and built-in alerts over system efficiency. The trade-off is higher computer resource usage compared to standard OBS. Watch out for features locked behind their paid premium subscription.
Browser-based and mobile options: Low-friction choices like Lightstream or Prism work directly in your web browser. These are excellent for non-gaming setups, podcasts, or "Just Chatting" broadcasts where you want to avoid installing heavy desktop applications.
How to Stream on Twitch from PC
The fastest PC setup is simple: create an account, download OBS, run auto-config, add your game scene, test your audio, and go live.
Follow this exact sequence to avoid common setup traps. Manual settings adjustments are rarely necessary on day one.
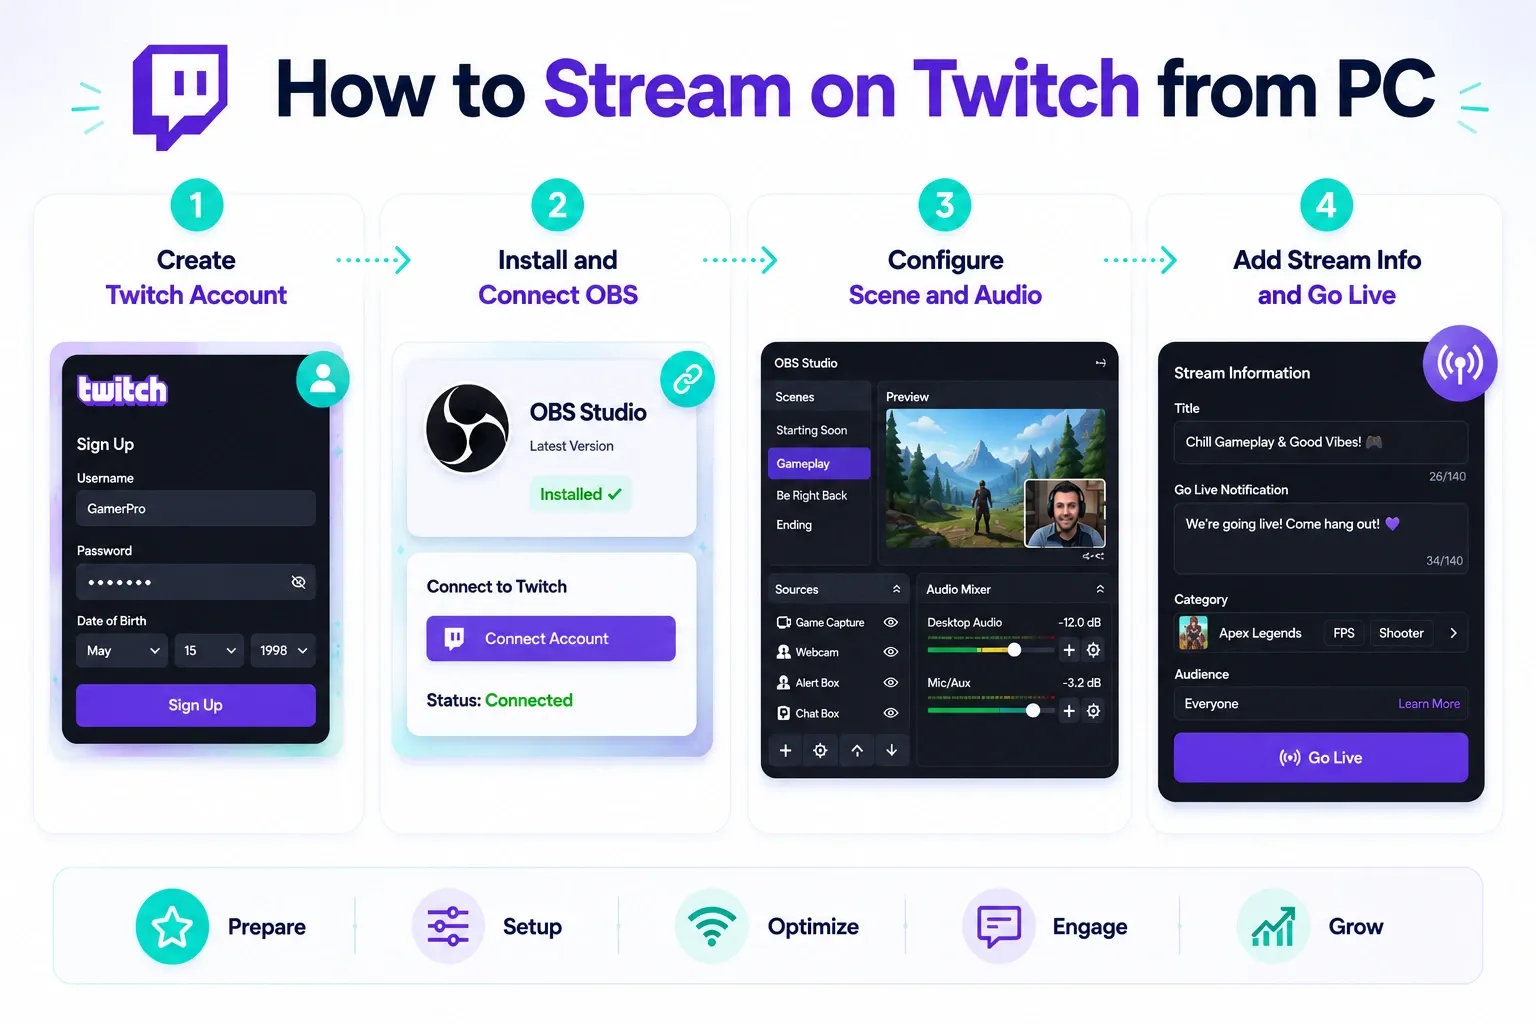
Step 1. Create your Twitch account and enable 2FA
bGo to the official Twitch website and create a user account. Set up two-factor authentication (2FA) in your security settings so your account is protected before you go live.
Step 2. Install OBS and connect it to Twitch
Download OBS Studio. Open the application, go to Settings, click Stream, select Twitch, and click "Connect Account." This direct login method is faster and safer than manually copying a stream key.
Step 3. Run the Auto-Configuration Wizard
Navigate to the Tools menu in OBS and click Auto-Configuration Wizard. This tool tests your internet upload speed and hardware to automatically apply the safest baseline settings. If your graphics card supports it, this process can enable Twitch Enhanced Broadcasting, an integration that streams multiple video resolutions simultaneously so viewers with slower internet are less likely to buffer.
Step 4. Build your first scene
A scene is your screen layout. Sources are the individual visual elements inside that layout. Start with one simple scene. Add a "Game Capture" source to grab your video game footage. If you want a camera, add a "Video Capture Device."
Step 5. Fix audio before video
Poor audio quality drives viewers away instantly. Ensure your voice is significantly louder than your game audio in the OBS mixer. Right-click your microphone source, select Filters, and add Noise Suppression to remove background fan hums.
Step 6. Add stream info and go live
Click "Manage Stream Information" in OBS to set your title and game category. Choose a category accurately so viewers can find you. Once set, click "Start Streaming."
How to Stream on Twitch from PS5, Xbox, or Nintendo Switch
PS5 and Xbox can stream directly to Twitch without a PC. The Nintendo Switch requires a physical capture card.
Native console streaming gets you online in minutes with zero extra gear. Capturing your console through a PC takes more effort but unlocks full customization.
Stream directly from PS5
Link your Twitch account inside the PS5 network settings. Press the Create button on your controller while in a game, select Broadcast, and choose Twitch. This is the fastest path for PlayStation creators.
Stream directly from Xbox
Open the Xbox guide menu and navigate to the Capture and Share tab. Select Live Streaming, link your Twitch account, and configure your audio levels. The Xbox experience mirrors the PS5 in speed and simplicity.
Nintendo Switch requires a capture card
You cannot stream natively from a Nintendo Switch. You must place the console in its official dock, run an HDMI cable to a capture card, and connect the capture card to your PC via USB. OBS Studio then reads the gameplay footage.
Native console vs. capture card
Native console tools are fast but lack custom overlays and advanced microphone filters. A capture card lets you use OBS for custom alerts and scenes. If you want to save money and avoid PC complexity, use native console broadcasting. Budget for a capture card only if you want professional polish or exclusively play the Switch.
How to Stream on Twitch from Phone
Mobile streaming works best for "In Real Life" (IRL) broadcasts, casual chats, and event check-ins. It is not suitable for high-end gaming.
Go live from the Twitch app
Download the Twitch mobile app on iOS or Android. Tap the Create icon, grant camera and microphone permissions, type your stream title, and select a category. Verify your audio is picking up, flip your phone to the correct orientation, and tap Go Live.
Mobile limits and fixes
Live broadcasting drains smartphone batteries rapidly. Keep a portable charger connected. Frame your face carefully, speak clearly into the phone microphone, and utilize the mobile chat overlay to read viewer messages. Rely on stable Wi-Fi whenever possible to prevent outdoor signal drops.
Best Twitch Settings for Beginners in 2026
Let OBS automate your settings. Only adjust manual bitrates if your stream constantly lags or drops frames.
Do not drown in settings menus. Run a local test recording before altering baseline numbers.
The default path: auto-config first
Always run the OBS Auto-Configuration Wizard. Keep Twitch Enhanced Broadcasting enabled if prompted. It automates complex encoder configurations and assigns optimal bitrates based on your internet connection.
Manual fallback settings
Only use these manual settings if auto-configuration fails. Match these numbers to your internet upload speed in the OBS Output panel.
- 720p at 30 FPS: Requires 3 to 5 Mbps upload speed. Set bitrate between 2500 - 3000 kbps. Use hardware encoder (NVENC / AMD).
- 1080p at 30 FPS: Requires 6 to 8 Mbps upload speed. Set bitrate between 4500 - 6000 kbps. Use hardware encoder.
- 1080p at 60 FPS: Requires 8+ Mbps upload speed. Set bitrate between 6000 - 8000 kbps. Use hardware encoder.
Prioritize stability over resolutionA smooth, stable broadcast at 720p is vastly superior to a choppy, lagging broadcast at 1080p. Drop your resolution if you have older hardware or slow internet.
What Actually Matters on Your First Streams
If viewers can hear you clearly, see the game, and you can read the chat, your broadcast is entirely successful.
Focus purely on audio clarity and basic chat ergonomics.
Audio quality over video quality
Viewers forgive blurry cameras. They leave instantly if your microphone buzzes or echoes. Keep your microphone close to your mouth and lower your input gain to prevent distortion.
Read chat without a second monitor
Do not buy a second monitor just to read chat. Prop your smartphone on a stand under your main screen and open your Twitch channel dashboard. It is a highly practical, zero-cost solution.
Simple lighting beats a better camera
An expensive webcam looks terrible in a dark room. Place a simple desk lamp behind your monitor to illuminate your face. Basic front lighting makes cheap cameras look professional.
What to Expect in Your First 30 Days
Zero viewers is normal. Your primary job is building a stable workflow, practicing continuous commentary, and creating discoverable clips.
Building an audience requires an off-platform strategy.
Zero viewers is standard
Twitch does not organically promote brand-new channels to the front page. Accept this early phase as essential practice for your technical setup and on-camera presence.
Talk to an empty room
Turn off your viewer count immediately. If you stare at the zero, your energy drops. Narrate your gameplay decisions and react out loud as if you are recording a YouTube video. This builds the habit of constant commentary.
Use clips to get discovered
You must edit your best live moments into short vertical videos for platforms like TikTok or YouTube Shorts. These external platforms push your clips to new viewers through algorithms, funneling them back to your live Twitch channel.
Set Up Your Channel So New Viewers Stay
Your Twitch profile must answer three questions immediately: who are you, what do you stream, and when do you go live?
Profile basics
Upload a clean profile image and a simple background banner. Write a short bio explaining your content style. Use the panels section beneath your video player to list your chat rules and a rough broadcasting schedule.
Stream titles and categories
Your title is your only hook when someone scrolls past your thumbnail. Accurately tag your game category, and use specific tags like "FirstPlaythrough" to set correct viewer expectations.
Affiliate and monetization
The Twitch Affiliate program allows you to earn revenue from subscriptions and bits. To qualify as of May 2026, you generally need 25 followers, 4 hours streamed, 4 different broadcast days, and an average of 3 viewers over 4 stream days within the last 30 days. Treat early monetization milestones as bonuses rather than reliable income.
The Minimum Viable Streaming Stack Beyond Your Encoder
Running a channel requires an encoder, chat visibility, basic moderation, and optionally, a distraction-free environment for studying other creators.
Day-one tools
You need OBS Studio to encode video and your phone to read chat. Turn on basic Twitch AutoMod settings to filter inappropriate words. Set up a hotkey on your keyboard to instantly capture Twitch clips during gameplay.
Blockify for studying streams
Many beginners spend time watching established streamers to study their pacing, overlay designs, and chat handling. It helps to keep your research environment distraction-free.
If you regularly watch Twitch to study creators, try Blockify's Twitch Ad Blocker. It is a modern browser extension built specifically to remove dynamically injected video and audio ads on platforms where traditional blockers fail. It features a dual-layer blocking system and intelligent safe muting, holding a 4.8 rating from over 5,600 reviews. For creators wanting an uninterrupted viewing experience while studying the platform, it is a highly effective supplementary tool.
Common Twitch Streaming Mistakes and Fixes
Broadcast issues usually stem from four areas: the capture source, the internet connection, the audio chain, or the device routing.
Dropped frames or lag
This indicates your bitrate exceeds your upload speed or your computer is overwhelmed. Lower your output resolution to 720p, reduce your bitrate, and close background applications.
Black screen in OBS
OBS shows a black screen if it lacks administrator permissions or if you chose the wrong source type. Run OBS as an administrator. Toggle between "Game Capture" and "Window Capture" until the footage renders.
Microphone echoing or distorting
If you echo, your desktop speakers are likely turned up, feeding game audio back into your live microphone. Wear headphones. If your voice distorts, lower your microphone gain dial.
Improve Your Twitch Viewing Experience With Blockify
If constant mid-roll ads are ruining the experience, many Twitch viewers use tools like Blockify to make streams cleaner and less disruptive. Blockify is a modern Twitch ad blocker built specifically for content-heavy streaming platforms where traditional ad blockers often struggle. It works across Twitch, YouTube, Spotify, Hulu, and regular web browsing, helping users enjoy uninterrupted streams without constant ad breaks.
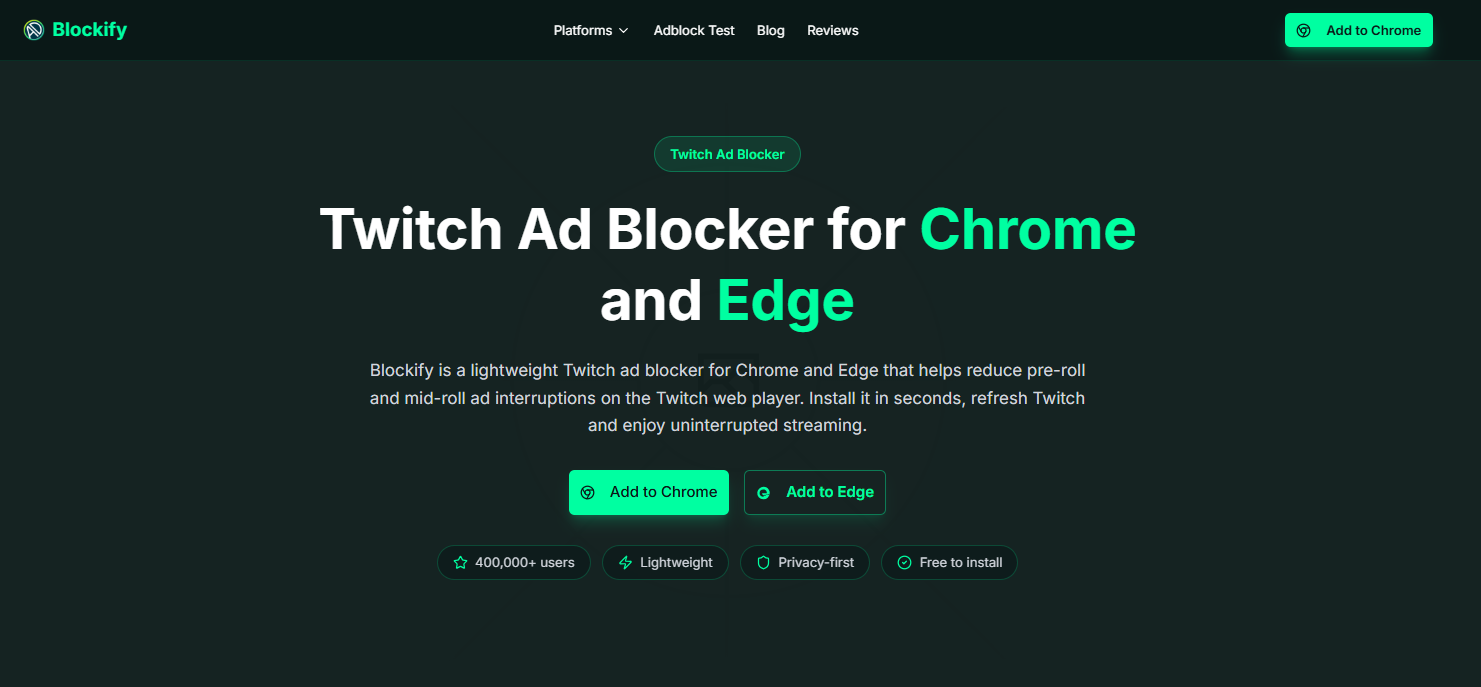
What makes Blockify different is its dual-layer blocking mechanism with intelligent fallbacks designed for dynamic ad environments like Twitch. Instead of relying only on static filters, it adapts to changing ad delivery systems more smoothly. Trusted by over 360,000 users and backed by a 4.8 rating, Blockify delivers a simple set-and-forget experience for viewers who want cleaner, distraction-free streaming sessions.
FAQs
What do you need to stream on Twitch?
You need a capable device (PC, modern console, or smartphone), a stable internet upload speed (typically at least 3 to 6 Mbps), a microphone, and a Twitch account. You do not strictly need a webcam, studio lighting, or a capture card for your first broadcast.
Can you stream on Twitch for free?
Yes. You can stream entirely for free using hardware you already own. By combining your current computer or console with free open-source software like OBS Studio, you avoid upfront costs completely.
What software should beginners use for Twitch streaming?
Beginners should use OBS Studio for PC gaming setups due to its low system impact. Console users can broadcast natively from a PS5 or Xbox. Non-gaming creators often rely on browser-based tools or the official Twitch mobile app.